
Working as a mastering engineer, over time, you pick up some really handy skills, skills that are totally separate to those you might need during mixing and writing. In many ways it is a completely different way of thinking than that which is needed to master track and often that is best served by a different set of tools. That’s not to say there is no crossover between mixing and mastering – that’s often why you find people using their DAW to get the job done. When it comes to mastering software though, there are many superior tools which fit the philosophy of the mastering engineer way better than your DAW. We will look at one of the best in this Blog – Steinberg’s Wavelab – one of the leaders in the field.
A little background
Steinberg have been around for a while. Founded by Manfred Rürup and Karl “Charlie” Steinberg back in 1983, arguably one of the most influential software companies in the studio world. Remaining relevant through three decades of great change in the music business is no mean feat. There are plenty of hardware manufacturers who are proven and long in the tooth but – the world of software is the world of new inventions and is full of pioneering souls. Some company’s come and go but with their flagships Cubase and Wavelab, Steinberg have sat comfortably on the cutting edge for most of their existence. Their first software released back in 1984 – Pro16 – which I believe was for the Commodore 64! Who still has one? Hands up! This simple multi-track midi sequencer (and let’s remember midi was brand new at this time also) opened up a whole world of possibilities, but it is with the next version – Pro 24- on the still legendary Atari ST, that it made the biggest impact. The legendary midi timing on the Atari is tighter than we have even today with our comparative supercomputers, and the Atari gave you 24 tracks of sequencing and novel features like quantize for those of us who play like ham-fisted mastering engineers. Fast forward a couple of years and we see the birth of Cubase, which to this day remains one of the most full featured production environments there is. Cubase for Windows was not around until 1992 and Wavelab made its first appearance in 1995. The effect of people having more precise control over their editing, and a good platform for mastering had a massive impact at the time and Wavelab gained a lot of professional fans. Since then they have brought us VST, Nuendo for people in post, numerous new versions of Cubase and Wavelab so they have been a constantly active member in the evolving way we make music. In 2005 the giant Yamaha bought up the company. People often wonder about the future when a big company buys up a smaller company. Will it dilute or change it? No, Steinberg is now a further 7 years along the line and have had many successful releases during their new chapter and while there is a great influence and collaboration with the giant it seems quite a good fit. Wavelab 8.5 is definitely a product of Steinberg who are now fully in the Yamaha mould – let’s check this out.
Why use a specialised mastering program?
Wavelab is for Editing, Mastering and Restoration according to their site. Its design is specialized to suite these tasks and that makes its’ tools and work flow much better suited to the task. Speaking as someone who masters daily AND someone who makes sample packs and generally has a lot of audio to work on and organise – the impact it can have is massive and that’s why I wanted to share my views on it. Since I started working with Wavelab 8.5 life became a lot easier and for a multitude of reason this software is going to get a lot of use from now on. We are looking at 8.5 in this review but we are looking at all the program as a whole rather than just the new features.
Although its tools can be useful in a wide variety of situations it is designed to be used by people who have a job to do. It brings together 4 main areas of use: Audio Editing work, where you can work / edit small files, or work on audio masters by using VST plug-in chains (including the latest VST3 plugin standard) or using their suite of restoration plug-ins to clean up an old recording or noisy voice recording. We also have an Audio Montage section, where you would pull together a group of audio files and create a CD for example, complete with track markers and CD Text and all the lovely stuff you get with a professional CD. There is an extensive Batch Jobs section, where you would work applying certain effects to a whole load of audio – automatically. This is one of the most useful and well fleshed out sections of the program. Finally there is a Podcast section, which features tools that are perfect for the budding or professional broadcaster. This program specifically focuses on the areas your DAW or workstation might skimp on and presents them in a way which is well thought out for the task at hand. When it comes to half baked ideas I often think about one DAW’s export straight to Soundcloud option, because that’s exactly what you need after a long session with tired ears, insta-publish!
So how does it make life easier?
Wavelab is a fully featured audio editor, so what does that mean and what use is it when you have to DAW? To be frank most DAW I have used are often awkward when it comes to getting down to the nitty-gritty of editing audio and often a little clumsy when it came to the mastering process as a DAW doesn’t have the tools and metering you need front and center, you have to set up most of the metering and other tools using plug-ins. In Live especially it is really bad, if you ever want to edit some drums by hand or reshape the tail of a sound, it can sometimes be a mess of convoluted clicks, automation and plug-in use – basically tools not quite designed for the job. Don’t get me wrong, you can utterly get used to this, and still get things done but when you use a dedicated audio editor like Wavelab you get more control over your audio and with controls designed to do what you’re trying to do.
In terms of preparing your ideas for a project or recording from a particular nice vinyl (royalty free I am sure 😉 ) it is a great solution as you can record, drop markers, edit out pops and clicks, with ease. Or dig in further if you need to right there and then. My main philosophy is that, as with all things in music the more care you put in to start the better results you will achieve at the end, so tidying up your samples nicely and being able to record them easily, chop them up automatically and edit them sweetly is all good in my book.
Beyond that we have its use as a mastering host. As a working mastering engineer this is especially important to me and I cannot over emphasise the benefits of separating your writing/mix-down from your mastering. Transforming yourself into a different mind space is probably the most important thing about mastering, because you definitely do need to think in a completely different way for each job. Considering most DAW’s will let you select your wave editor to your preferences and you can easily pop in and out of samples to make the finer changes…it’s a no brainer. It makes producing great work, easier.
Mixing, Mastering….what’s the difference?
It is all about technique. In the past we have looked at what makes a good mix-down. A good mix-down can be almost all the way to a great master in terms of the musicality and balance of the sounds, but not in terms of loudness and the main difference is your intent and your way of thinking. Of course a great master isn’t about loudness – as we have discussed before that is the great folly of a lot of modern music. Great tone and well balanced dynamics are what you need to concentrate on. So when you’re mixing in Cubase for example, you need not even consider loudness or “competing” with the tracks you are trying to emulate. A little tip I like to give people is that after the first writing session stop listening to any comparison tracks you have, sometimes they can actually be more of a hindrance than a help! Often you will have written an idea which is quite different to the ideas that first inspired you and that is completely valid. So the comparison track if used during mixing could really miss-direct you (sometimes not always, you just need to be careful when referencing). Once you have a good idea, concentrate on getting a good balanced mix where you can hear everything and the flow of the rhythm and musicality of the track sounds good and balanced. Once you have this, the mix-down is done. From that point on it is good practice to stop using your DAW. Don’t start thinking about loudness and making your track compete with others. It is time to export your mix-down and take a break before you think about mastering it. For the next stage of the process make that change of software, change of work flow and altered way of thinking.
Training your Brain
When you are mastering a track it’s important to separate this task from the mixing process and what comes before – I don’t mean just in terms of time allocated. Using a different program to do your mastering has benefits on several different levels. You can – over time – train you brain to associate a way of thinking with working in each program, so when you open Cubase or Ableton you are automatically going into mix or writing mode. But when you open Wavelab you instantly (not guaranteed!) go into mastering mode and start to think in the way you need to for a different task. Wavelab has been designed to fit a mastering ‘frame of mind’ and there are only 10 plugin slots. If you are using more plugins than that maybe you need to go back and tweak your mix-down? I think 10 is a good place for it now – according to my habit anyway – enough to try ideas and not run out, but not too much to allow you to make the job convoluted and lose track of your goal. I will talk more on the actual process of mastering in the future blog so for now, back to the task at hand.
So we know why Wavelab exists and how it fits into the big picture. Now I will take us into a fine grained look at what you can actually do with it. Let’s face it, for the full version it’s not cheap, this is a professional tool and in that it’s uncompromising. If you have a job to get done this is the one for it, maybe it doesn’t have the flashy features of its brother Cubase but the things you can do with it are just as useful;
Editing Audio
The most obvious use of Wavelab in my opinion is in Analysing, editing and working sample accurately with audio, be it on little drum shots or mastering tracks for vinyl, this is where Wavelab comes into its own as a fine companion to any DAW. You can zoom right in to see individual steps in the digital audio, work with zero-crossing snapping on so all your cuts are clean and avoid any nasty pops and clicks. The audio file workspace has all the analysis and editing tools you can think of so you can quickly bring up a spectrum view of a loop to spot a problem or find the average pitch of a tricky drum not quite Melodyne but useful none the less. Speaking of the Spectrum editor, it is one of the most impressive tools in the software and one with a lot of uses in sample based music for all our House heads out there. Now we all like to sample records. Old stuff new stuff, often you’re getting quite noisy material. Often that can be exactly what the track needs, especially when you want a bit of extra life in your track, a bit of dirt to fill in the background and give your music a little borrowed soul. Sometimes though it can just be messy when it comes to knitting everything together in the mix and we need to tidy up, envelopes can do so much but there are limits to what we can do to a sample in a sampler. There are a lot of different techniques for tidying up a sample, sometimes you can do it easily with a quick edit sometimes it’s a little more involved. What the spectrum editor does is let you look at a visual representation of the sound, both in the frequency domain and the time domain. So for example if you have a stubborn little mid-range bump and some hi hat left in your kick it’s really easy to see this, select it with the selection tool and then affect ONLY those frequencies. So you can filter them leaving the boom of the kick completely untouched. There are also plenty of options for what you do with the problem areas you find. On top of that Wavelab has a range of audio editing tools so you can always do what you need to do.
Batch Processing
As you might know here at ND we produce regular sample packs for all our lovely members. This involves recording and working with a mass of wav files all at once and often quite a bit of hardware. On a regular basis this ends up in huge boring repetitive tasks, in fact I remember when I worked on the first pack, I spent about 10x as long as I should have on it just to get it right. Renaming files, adding in the key & tempo of loops – there are quite a lot of pitfalls that can end with you spending a whole day doing something really boring. (Welcome to the music industry folks) It is the same when you’re working with your own samples and organising things for you productions. This program has the most full featured batch processing system I have ever seen, by a long way. It is a step up from previous versions of Wavelab – as it has all been unified into one process and screen. You can now set up a long batch of plugins to be run on every sample; you can have external effects included in that too so a run through the Studer or Neve is a breeze. You can choose where the files are spat out relative to your original sounds and you can choose how the filenames are renamed in a very comprehensive manner. Why didn’t I have this a few years ago!
Sound Restoration
One of the more interesting set of tools Wavelab comes with is the brilliant sound restoration tools by Sonnox a software house thats made waves in its own right. It’s quite surprising how good these are and I don’t mean that as an insult, just the results you can get far surpass what you think would be possible. Using them lightly can really transparently remove unwanted crackle and noise from a vinyl recording. (who on earth would want to remove that I do not know!! ;)) I think its use for restoration is really impressive when you team these plugins alongside its spectrum editing tools. A nice big name addition to the plug-in set.
Montage and CD tools.
Actually getting to grips with 8.5 came at a quite good time for me, just as I got the software I was working on an album for Mr G we had already finished mastering it when a DDP file was requested. DDP is the way you package a full CD for manufacture professionally. Admittedly this is the first time I have used Wavelab to make one but being impressed so far with its function I thought let’s give it a go. You drop all your tracks into a montage put them in the right order on the timeline and then use the CD Wizard to put appropriate CD Track markers in and boom, done! It’s crazy how simple it was compared to other offerings. Adding the CD Text and metadata was made easy too with some automation tools included also. Now I am not sure how many of you guys would make use of this kind of tool, but if you wanted to make and burn proper professional style CD’s this piece of kit is top notch. For my fellow mastering engineers it’s really worth the price alone, really slick implementation no matter what your end format and there are a lot of pre-sets to get there. In this section you also get a hand meta-normalisation tools, this can help you get a whole collection of tracks around the same average loudness automatically.
Monitor A/B/C
My favourite feature in the latest version of Wavelab, and a feature I am sure I’m miss-using completely but hopefully to great effect. In the master section you get the ability to setup up to 8 different output monitor sets, then switch between them seamlessly without clicks or pops or other drop-out issues which especially with some plug-ins can really jar your comparison. When you are comparing two sources its important to swap as smoothly and instantly as possible. This is hugely useful for anyone wanting to check their mix on a variety of speakers. Something I often talk about in my blogs is that when you are comparing things make sure you switch them quickly as the time for which your brain has accurate audio memory is only about 7 seconds (if you’re lucky!) If you compare clips longer than 7 seconds you brain actually relies more on normal fallible memory than the accurate short term memory so your comparisons can be flawed to say the least. Being able to chop between speaker sets quickly is a fantastic tool for being able to focus in on changes in the sound and tell if they are really the improvement you are after. When I say I miss-use this feature a lot it is because I have been using it to compare the Studer mixers channels to each other and to the clean signal, and often it’s really eye opening – the differences – and a good way to try out different EQ ideas or hardware chains while working. Of course I am not even mentioning the benefits of being able to compare you work on different speaker sets, which is the core intent of this feature.
As I mentioned before one of the best things about Wavelab is the fact it has been specifically designed to be good, quick and nice to do these jobs, this means it has various enhancements which make life easier for you. Lets take a look at how its put together;
Metering options
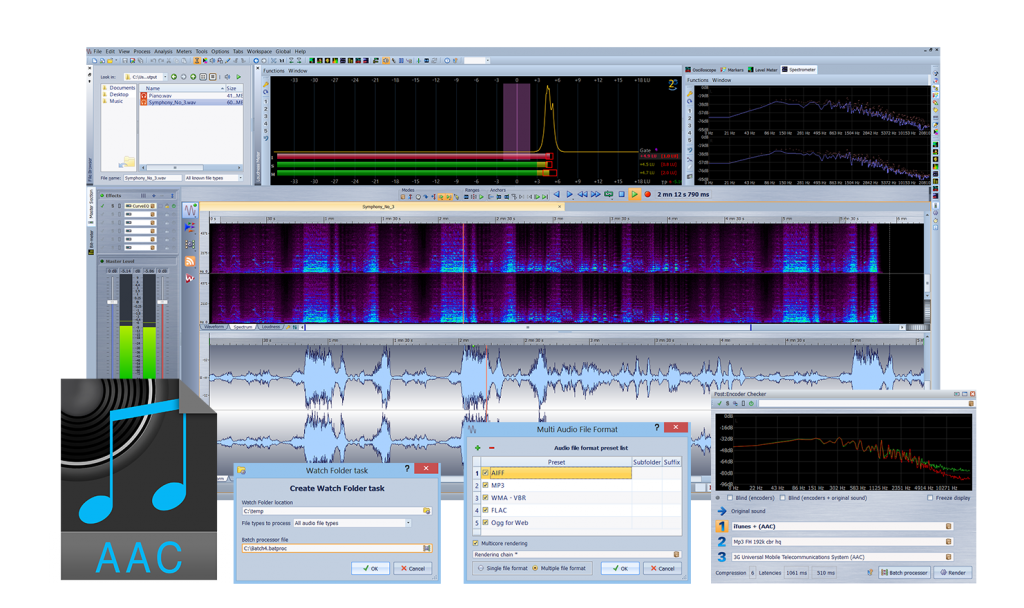
Over the past few years I have been a big proponent of EBU 128 and loudness standards in music as opposed to peak metering to help us get over the loudness war which churns out horribly limited music just because of the way we chose to organize things. All its doing is crushing and ruining music, in the new Wavelab you have loudness meters readily available in different places and also all supporting modern standards. In fact they are really easy to use and provide information which is really easy to understand and put to use. This makes life a lot easier if you want make sure you keep that nice dynamic sound we all appreciate. When it comes to club music and house music this is going to make your end results sound so much better – transients and dynamics are what make the big tracks work in a club, not digital loudness. Having this full support for loudness stands in 2014 is a must for any professional application. If you load there included Loudness meter you will get a nicely docked meter in the top left window of the basic layout, split into various loudness measurement over various time-scales, you can also set this up to follow the particular loudness standard you are working too. Using a row of icons along the top tool bar you can also open various tools and meters in there own floating windows, this is especially handy for setting up your own workspace but gets even more useful when coupled with the control window, which we will talk about in the next section. There is also the option that on every sound you drop into the software you can quickly flick to a loudness page and get a great visual idea of how the sound goes, little references like that are great to keep yourself aware of what’s going on, matching what you eyes see and your ears hear.
GUI Layout & Control Window
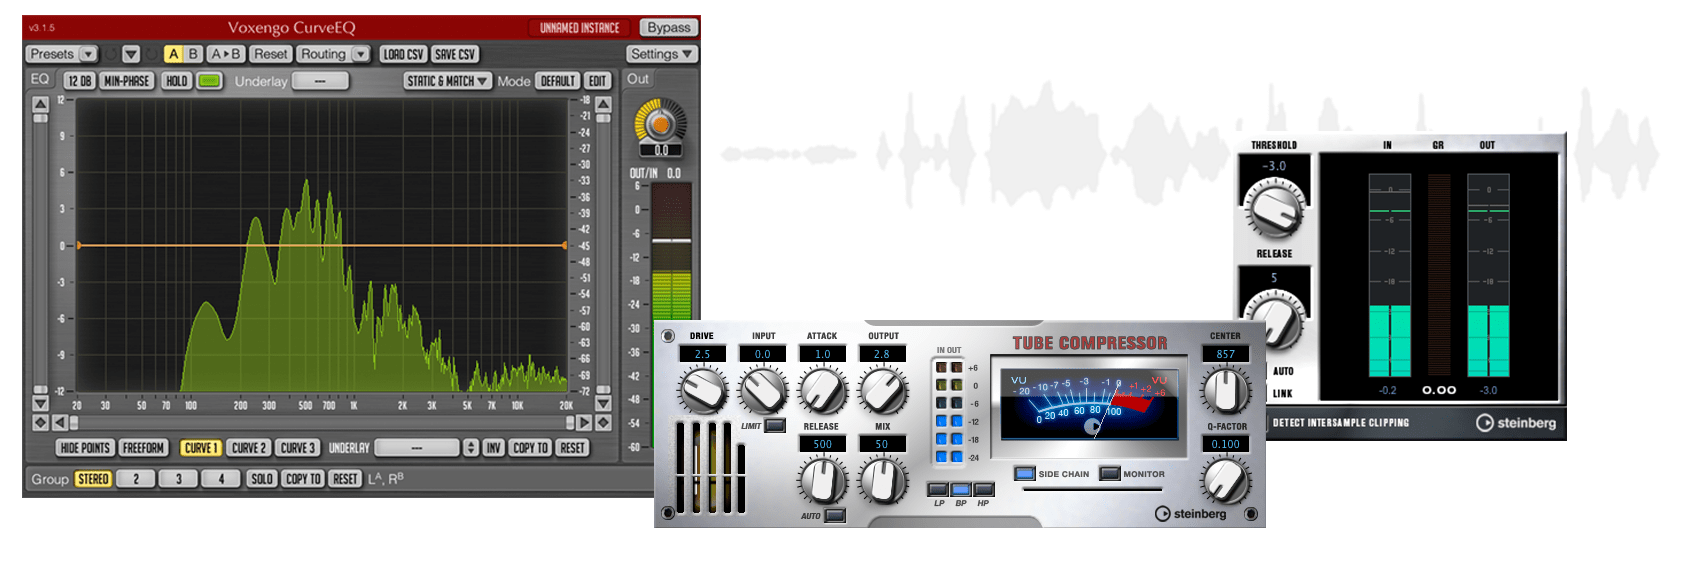
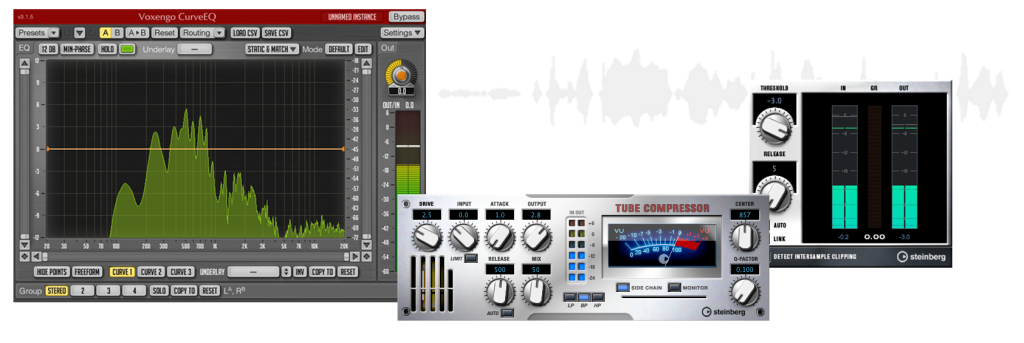
Whatever software you’re using on the computer, I’ve always found keeping track of a few plugin GUI’s and other displays can quickly become a nightmare of clicking, moving and generally tedious work, so it is nice to see that in the new version of Wavelab they have gone for a modern docked and organized GUI – at least in part. Unfortunately, this isn’t docking or resizing for 3rd party VST Windows yet (unless I missed it – but VST GUI re-sizing needs to be a thing doesn’t it? Especially for those using 4k monitors) So you do get a little bit of clutter as you work, but the main controls are nicely docked. What you do get for plugins is a nice single window plugin manager, which lets you tab numerous plugins away on the same window in the montage view. It’s a really neat thing to have alongside the window management tools in Wavelab, especially as it makes a good go at remembering where you leave plugins, so a custom screen for when you’re working is easy to set up. With plugins you can also quite easily minimise them all, to clear your screen and see the audio by folding the plugin section of the Master channel it is little usability tweaks like this which just help speed things up. One thing I would liked to have seen when using plugins is for a button on each VST window that allows you to close all other VST GUI except that one. You can also save different custom workspaces you set up and can recall them later, especially if you’re switching between mastering and editing work or something else entirely. On top of that you can split down the main screen into different equal sections for hosting files, batch processing set-ups or other things, so when your working with more than one file you can have it all displayed on one screen and for those of us with high resolution monitors this is especially useful. Last but by no means least one of the most useful features of Wavelabs GUI design is the control window workspace, what this allows you to do is set up what amounts of a custom window full of all the different meters you might need to work with, and have this showing on a separate monitor or on the same screen. You can dock as many meters as you like, resize them to fit your needs and have it all as one display. Although there are still elements that can be worked on, I was really impressed overall with the thought being put into Wavelabs GUI, lots of stuff is dockable, easily organisable and screen space clutter is kept to a minimum.
Encoding for the web
I love this, in Wavelab you can set up 3 different encoders (128kbps MP3 etc.) and audition your master through them in real time. You can chop between the three / changing the codecs with even some blind A/B functionality. There really is no excuse for a poor sounding Mp3 any more when you can check them next to each other and find the best balance between size and sound. Mp3s generally sound bad – we all know it – but they can sound acceptable if you’re careful and this encoder checker really lets you get your ears on to what’s happening to your music when you fire it at the Internet.
In Summary
Since I started using Wavelab 8 it has become quite apparent it is one of the best mastering platforms for Windows and OSX. It is completely current with all the latest digital specs – like VST3 and 64bit – whilst at the same time having some great hardware integration and super solid performance. Working on a master to tape the other day and I thought I would take Wavelab along for the ride to test out its hardware integration and it was really just about setting up their external plugin and the correct channels and you could literally render your fully taped master live (in sel sync mode) as if it was VST’s – this is what the future feels like I am damn sure. Working with hardware and Wavelab has become a lot easier with the mixture of its Monitor output switching and external plug-in integration amongst numerous other usability tweaks which just make sense..
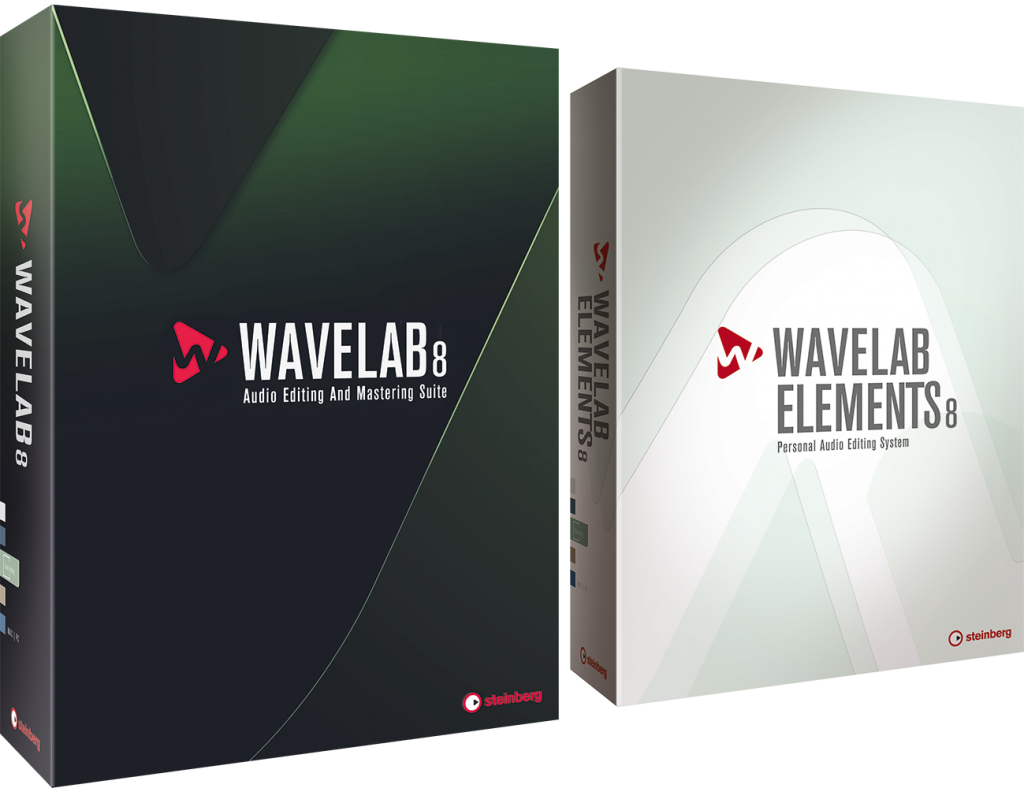
Everything in Wavelab has been fine-tuned over the years to make its work flow productive, efficient and quick and putting the right tools at your fingers for Editing, Mastering and Restoration. Wavelab comes in a few different versions depending on what you need and your wallet, and there are many more features we haven’t talked about in this review! If your serious about what you do a good Editor like this is vital. WAVELAB