

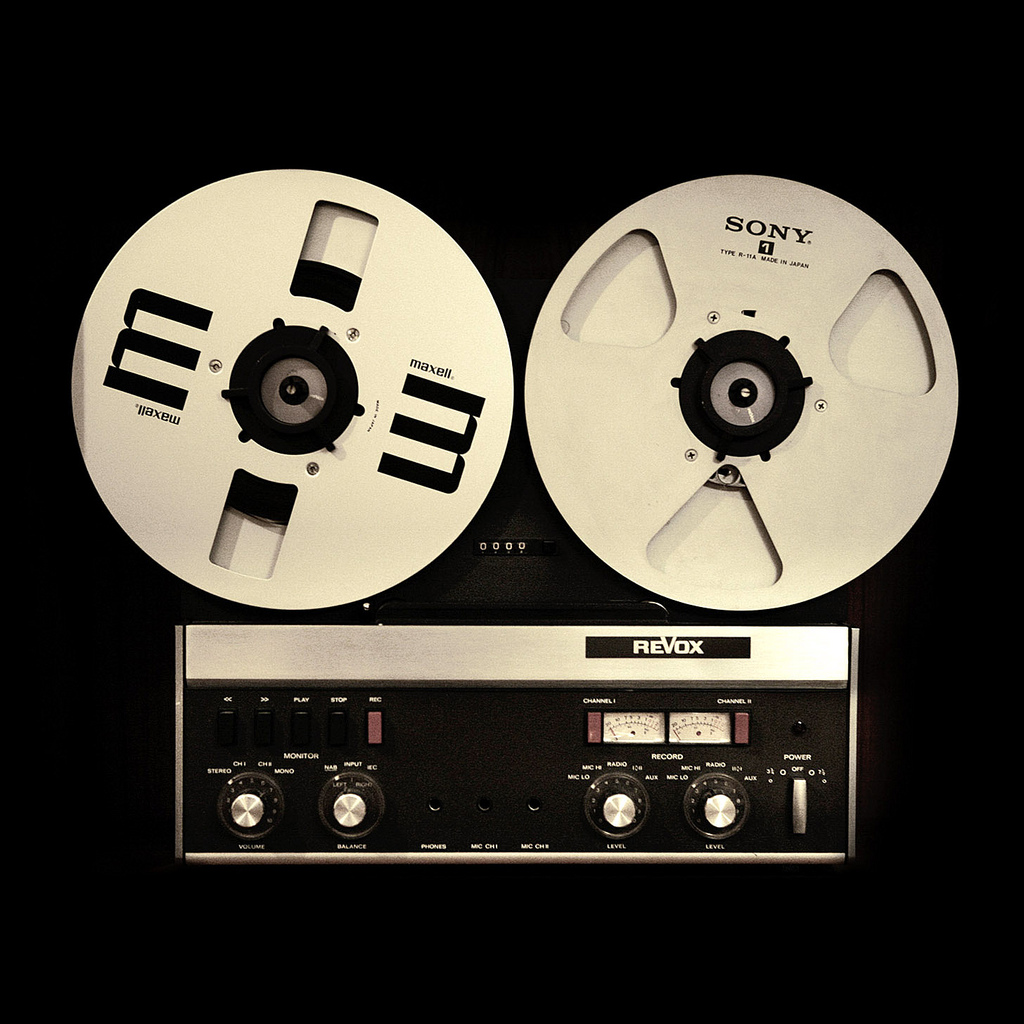
We thought we would do more of our articles which walk the line between editorial and reviews. In fact what we plan to do is just share stuff we think you will find useful, the good stuff, the stuff that’s worth checking out. Not only that but tell you how we like to use and hopefully share a few tips along the way. Today we are looking at U-he’s Tape Simulation “Satin”.
What is Satin?
Satin is a recent plug-in from German development house U-he. We have really liked some of their work in the past so when they released what is described as a “Tape Construction Kit” it piqued my interest to find out more and test this tool out. As you know we are big lovers of great analogue sound here, and we try to push techniques and tools that get as close to that as possible with your equipment be it hardware or digital software. I am definitely no purist.. however I will only tell you something sounds good when it really stacks up.
Now let’s face it, simulating tape is probably one of the hardest jobs out there. Although we all know analogue sound is often hard to define (Read here for my go at it) It’s safe to say that tape is one of the most rich examples of what people love about analogue sound. It is the combination of a collection of very separate audio phenomenon having an effect on your audio in a system that has multiple stages; where at each of those stages you will get a mixture of the phenomenon simultaneously so, as you can imagine, it’s very complex. The outcome of this complex system is… pretty sweet actually. So the task at hand for U-he is a huge one, and no doubt there will be room for improvement, as there always is when you’re trying to program in code the effects that you once got for free from the components themselves. But as with previous U-he stuff, I’ve often found the results to be damn useful and desirable even if they’re not 100% perfect. In their manual U-he talk about emulating: magnetic tape saturation / smoothing / blurring of transients / compression of high frequencies / ‘head-bump’ effect / asperity ‘3D’ effect and ‘glue’ effect with multiple tracks which in my opinion is a pretty comprehensive set of variables to concentrate on based on current emulation knowledge.
Simple at first, until you open the bonnet.
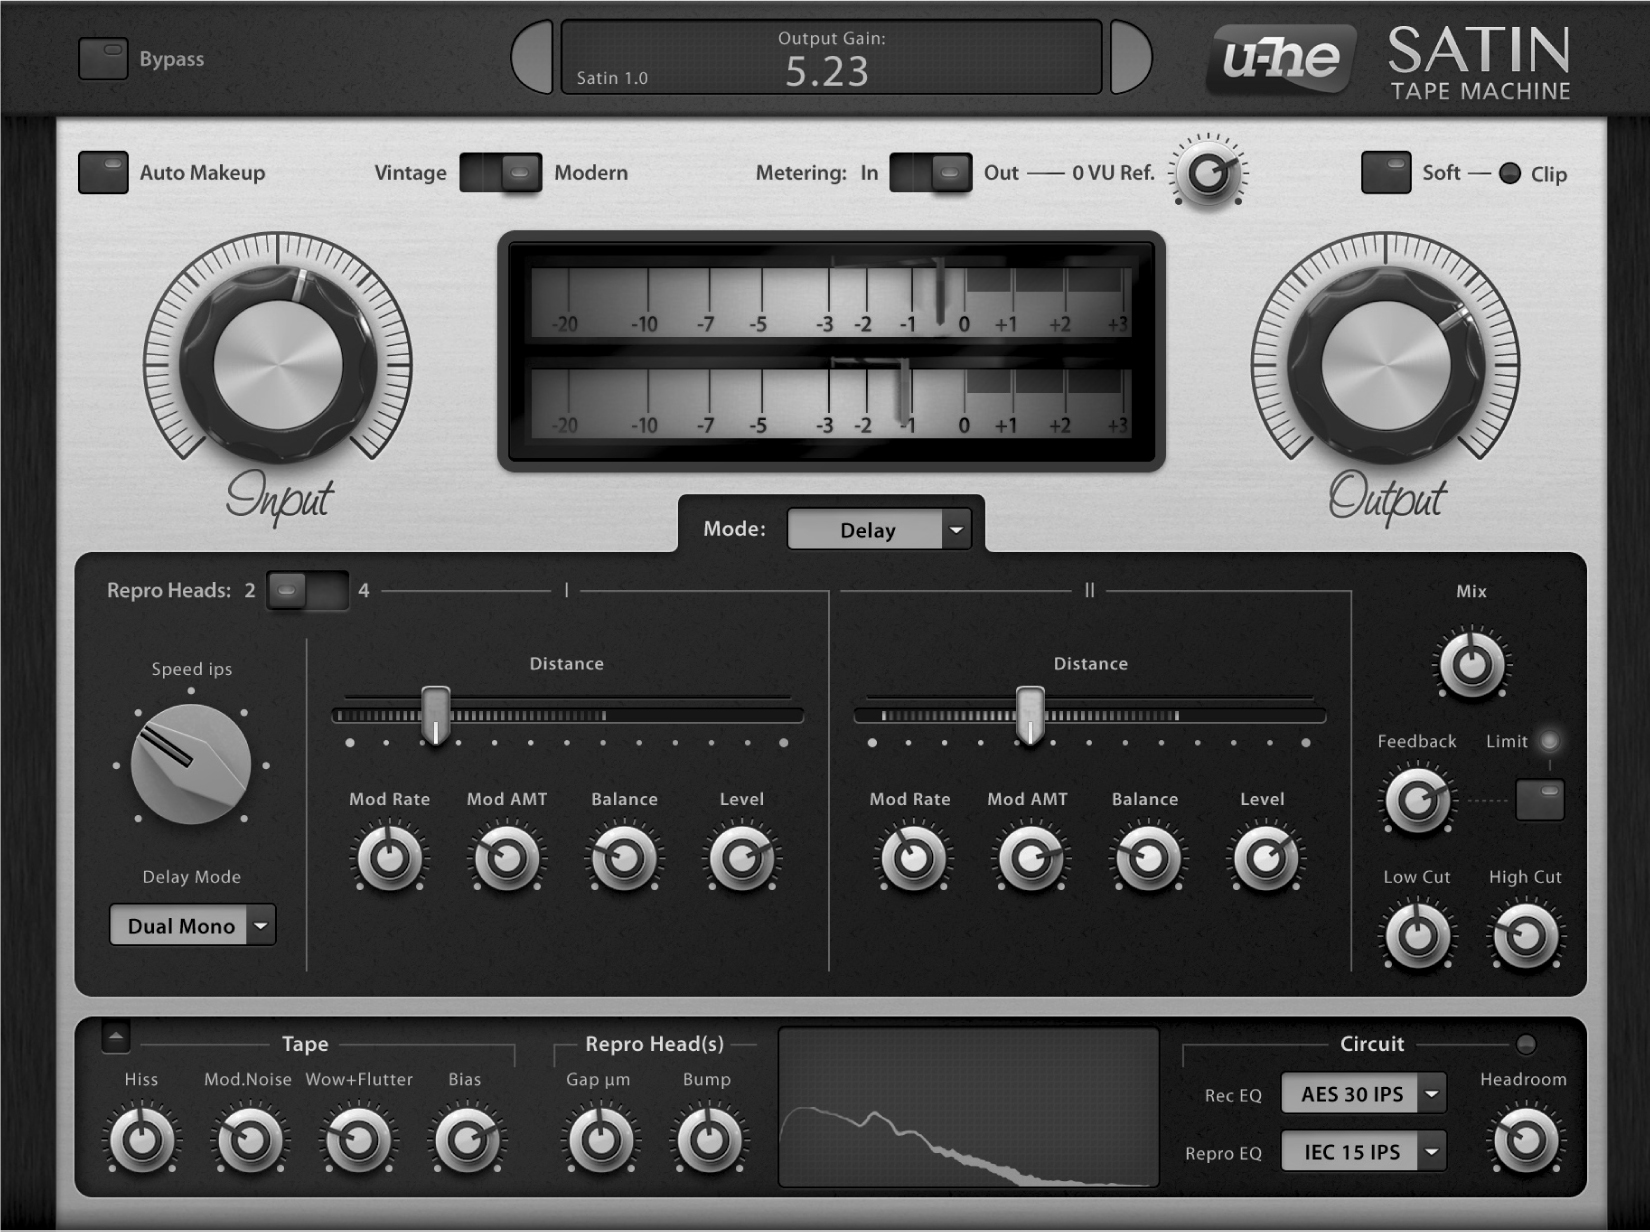
When you open Satin the first screen is very simple, I like that they’ve kept it simple. Input / Output control over the basic tape emulation, tape speed control and pre-emphasis are available – you should find this boosts the highs a little bit on the way into the machine, originally done to help keep things clear above the tapes noise floor. Using a faster tape speed will also lower the amount of noise you hear. (Although this noise amount can also be controlled when you open up the lower Service panel – a feature I have yet to find on any original Studer 😉 )
Digging deeper into the service area, there is a handy feature – a little analyser type display. This gives you a good idea of what effect your settings may have on the sound, as you play with the emphasis or the speed you can see the response curve change and amount of noise or other modulation is represented by movement in the line. That’s a neat way to give you a general overview of what you’re doing with the plug-in as you can quickly end up with a heavily affected sound when you’re trying some of the different options.
The plug-in has automatic output compensation linking the input knob to the output, which is really handy feature on a plug-in which will be imparting some distortion and compression along with changes in level, and it allows you to, for example, select a Tape emulation preset in Studio Mode, and then use the compensated input knob to basically hit the tape harder without any real rise in the overall volume which could mislead you when you’re judging the effects of your handiwork. This is very handy especially with the presets in Studio Mode, where the plug-in is acting just as a tape deck simulation without any of the extra tricks Satin can do, which we will talk about a little later.
Be aware though, when using auto compensation mode, if your input level is set too low, you’ll find you end up turning up the noise floor. So make sure your gain staging is good going into the plug-in and not too hot so you have to turn it down. Unless that’s the type of sound you’re looking for those of you thinking I just need another 10dbs of tape hiss.
So how analogue does it sound?
OK so this tool definitely has something about it in a very good way. Pushing the input knob on the Studio pre-sets reveals a pleasing distortion and warm squeeze on the sound – beats get a bit more toasty and mushy – but they don’t lose definition or become harsh in the way other plug-ins might. If you read my previous blog what is analogue linked to above, you can definitely feel some of those ideas at work, and the sound you get is definitely a great approximation of what you would be getting from a reel to reel, is it identical? no not quite, but then neither were any two of the original machines. The more important question is does it have all the magic of the best of the old machines, in a word no – not in its entirety but boy this thing is getting good. What it does have is still one of the most convincing tape simulations I have heard in plug-in form yet. So it has some of that elusive magic and that makes it useful and a great tool to have in your arsenal especially when you tag on the extras made possible by it being a digital version. It’s very gluey this thing, the compression of the sound is very nice indeed, especially using the input compensation mode – you can really hear the way the sound smooths out and has more unity and a rich tone. You get that feeling of the tone of the sound being sculpted in a nicely musical way, and I think that’s the most useful thing about this simulation, it has that inherent musicality you would expect from the top kit that made it sought after. If you are looking for analogue sound in the box, this thing can definitely give you a useful amount of it. I would even try putting a nebula instance after this plug-in with one of their dynamic samplings of tape tone as well. In fact that idea really excites me, using the algorithmic plug-in alongside the sampling of dynamic analogue tone on a track should give you a pretty damn convincing palette to play with. One being really excelling at the heavy lifting of the emulation whilst the other excels at the more subtle tonal changes. That said if you’re looking for really dirty trashy tape sounds, you’re going to have to dig a little deeper under the hood.
Under the hood
So let’s poke under the hood. These guys have created quite a complex plug-in, with enough flexibility in what it’s simulating to allow them to clone quite a few different machines and create many other useful pre-sets. Once you open the Service section you get access to controls for stuff like Hiss (needs no explanation). Asperity (noise that comes from the surface imperfections on the tape) and control over Crosstalk between the channels. Also included are controls for Wow and flutter modulation effects and then controls which have an effect on the tone of the sound like Bias control and the Gap and Bump of the Repro Head (The gap affecting the balance of frequency both low and high and the bump giving you a low frequency increase, that is not all they do but the basic gist, as with everything in this simulation its going to be more complex than you think). The manual will tell you these two controls are good for balancing your frequency response but I suspect they’re also great tools for tweaking and changing the balance of your elements in the mix. One more thing this service section offers is control of the Record and Repro EQ circuits used. So you get offerings of FLAT, 15IPS AES 30IPS etc. All these have effects on the sound modelled from the real circuits. This allows you to get closer to the sound of many tape machines of years gone by and with quite impressive accuracy and of course this is all tonal control you would not get from a real reel to reel without taking it apart.
Noise reduction circuit emulation
When tape was the main medium for recording and storage of audio, a lot of effort was put into making it better, less noisy and with a greater usable dynamic range. One of the main ways of doing this was noise reduction techniques, as without these the only tape decks with a reasonable usable dynamic range were ones that were high IPS and wide tape, which were very expensive. Noise reduction brought usefulness to a much wider variety of machines and set-ups. These work in a few different ways and without going into that in detail, the reality of what this offers you in the U-he Satin is an extra layer of tonal and sound variations you might find useful, you have the option of selecting which noise reduction system is used for encoding and which is use for decoding. Using this alongside the FFT Analyser you can create some quite unique effects, these variations can be used to sculpt your tone in different ways and to be honest the best thing is to dig in and see what each does as you won’t be needing its’ actual noise reduction utility when you can just turn down the Hiss in the simulation, it’s a nice addition in terms of options and authenticity though. The neat bit about this section is you can blend the wet/dry of the Compander section with the rest, which is a nice touch allowing you to tame any effects you might dial in.
Studio Mode
There is a good selection of pre-sets that the guys have put together and they are mostly very useful. Although they offer recreations of some famous and sought after reel to reels, the best value you will get with a plug-in like this is when you get hands on and get tweaking away. That is also one of the main benefits of its plugin form, you can do the equivalent of change out components and tapes and change speeds in a second, getting the balance of the subtle distortions and the way it’s affecting your dynamics just right. Of course how you use these presets is going to be something very individual to your sound or mix – although starting by slapping their Studer A800 preset on each of your tracks for a start is a good place to begin. With the old machines you often had to work your mix to fit the machine, now you can do the opposite if you want. It’s important to check yourself when using something like Satin or even when you are using real tape, the effects can be quite musically sweet and therefore are very easy to over-do so do check your work. A/B it with your reference material and always be prepared to dial things back a notch.
One of the best aspects of this plug-in whilst in Studio mode operation is that you get is the ability to define any instance of the plug-in as part of a group and control many instances as one. When it’s part of that group any changes to any instance of plug-in will propagate amongst all the other plug-ins set to the same group. This is really neat as you can whack this across your entire track and then make changes wholesale whilst the effect is still being done individually at the track level rather than on the buss. This is very handy when it comes to fine – tuning the tone of your mix and getting the right overall sound whilst retaining the nice gel effect of all the tape simulations adding together. Effectively this lets you go back in time and use a different tape machine or change the calibration slightly, hit it harder or back it off as its too smoky which is quite cool when you think about it.

Flangtastic
Flanging came about by mixing two tape machines together playing the same thing and placing your finger on the flange of one of the reels so its’ speed was altered and this would cause phasing effects when mixed back together with the other machine. Sounds simple but the famous sound of this is really something special, creating not only movement but subtle stereo width. In Satin, flanging has been implemented in a pretty old-school way but it’s uniquely useful for it. You won’t get any of the modern style auto flange moving back and forward but have the opportunity to control this manually yourself and to trigger one shot flange passes when you need them in your song while performing. I kind of like it, I am always pro any opportunity to get more human into my robot music.
DELAY…Delay…delay…get it?
I like the way U-he think: when they go to make something they don’t look to keep it simple or do just the main aspect of a simulation; they look at all the possibilities. Not only do we end up with a lovely tape simulator we end up with the modulation effects we talk about above but also delays. Tape delays! Everyone loves tape delays and with the simulation at the heart of this plug-in the delays we end up with are some of the most exciting and authentic you can get in the box. You get control over how many heads are used to make the delays and their balance and level. So you can actually create some bloody complex things here, with master control of the feedback and a limiter to keep things in check, you will find a lot of creativity in this relatively simple set-up.
BUSS IT
One of the best uses after the overall tone and gel changes you get from placing tape on each channel is the use of it on your buss. Here the inherent compression effects of the emulation will pull things together as one in a different way. It can sound really good as that final touch of gel, use it sparingly or use it outrageously but make sure you keep listening and comparing your work. Recording to tape is one of the most wonderful sounding things you can do, but it’s easy to overdo. Like I said before it’s a sweet thing, even if the emulation isn’t 100% you need to use it sparingly.
Transients
One of the things I really liked about this was that as you boosted the input, the way it ate into the transient material of your track was really slick. It just sounds good and this is something that in the digital world can be really useful for rounding off sounds and giving things a little more of fat vibe, making things a little warmer. Maybe this is something to be avoided or used in only very small amounts when your on your master buss. Here you will want to be careful about keeping your dynamics nice and punchy, but used sparingly across each individual sound and in the right amounts this alone could really help pull a track together.
What Satin represents – another step towards emulating analogue with authenticity
So this analogue emulation drive with developers right now is, in my opinion – very important to both music and producers – when people call for just digital progress and to STOP emulating old equipment they are miss-understanding the big picture of what’s going on here. From the beginning, music was built on physically played instruments and real equipment that did all sorts of things we didn’t understand fully. It was not built on the digital system that excels at perfectly reproducing SIN and SAW wavs. That perfection is NOT musical. From the glorious resonances of Stradivarius violins that depended on the cold winter conditions that made the wood grow differently in that part of the world so that it resonated differently creating its unique almost human voice-like sound – to the instabilities of tube gear which created such a warm impression in the listeners even when the gear itself was sub par and cloudy in quality, there is a whole world of knowledge of musicality outside the computer. We need to know and look into all this in great detail to be able to replicate it for use in a modern DAW. Often it’s a small and quite subtle effect that makes a difference but that smallness of effect should not discredit its worth. Remember, the smallest touches in music make the biggest difference.
Emulating analogue is not about looking to the past in some obsessive way, it’s just the desire and strive to get back some great musical side effects of some great tried and tested gear. It’s not good because its old, it’s good because designers built their systems over the years through trial and error and the ones which stood the test of time were also used and chosen by working mixing engineers, musicians and all sorts of people – tried and tested in the truest sense of the word, measured against musicality and usefulness alone – not some stats. Engineers would try all sorts of different components and pick the ones that sounded best often without actual knowledge of why it sounded better – don’t get me wrong they were expert engineers, they knew what sounded good. They also knew how it must be used to sound good and within what parameters of use it would stop sounding good. But when we moved to digital, you had a completely different system, your knowledge of which components sounded good meant nothing. You had to program using computer code, and not just the simple basic function of the component but also all the non linearity and other behaviours of the component that affected the audio. This is a knowledge no one had at first, in a funny way we had been getting all this for free. So now nothing is included unless you program it yourself. So to those calling for plug-in makers to just concentrate on creating new things, they must understand that working out how to program these musical effects from old and new analogue gear is an absolutely vital step on the road to creating new things that sound just as good. It’s not just added noise – it reaps decades even centuries of music and engineering trial and error and know-how distilled into the selection of components and designs that work well on a musical basis, components that enrich the musicality of the sound put through it.
We don’t like these pieces of hardware because they sound old, or that it’s some retro obsession thing and we need to move on. We chose these components because they sound musically good, for all different types of music and that reason is just as relevant in today’s world, That people want this stuff is not people clinging to the past but a sign of something missing in the digital realm. We are just finally filling in the basic scientific knowledge that has been missing from our industry, and that’s what Satin represents another step forward on that road to greater knowledge.
There is also a great manual with this thing, so don’t forget to dig into that for even more info.